Render Region Matrix Filler

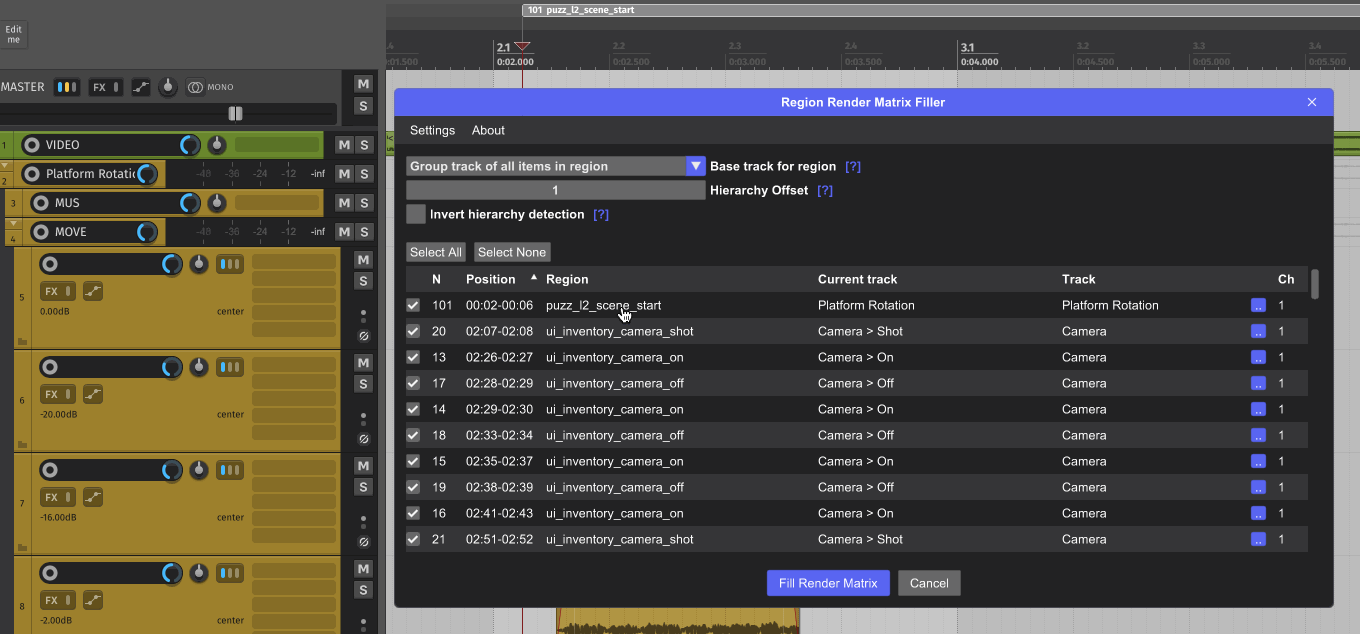
Region Render Matrix Filler significantly speeds up the process of filling the Render Matrix in REAPER, especially in projects with a large number of regions. It’s particularly useful for tasks like layer-based sound rendering, gameplay VO synced to video, voiceover exports, and other scenarios where batch rendering is needed.
- Automatic track assignment in the Render Matrix based on settings
- Optional automatic channel count detection based on region name
- Region and track preview with navigation
- Manual override of track assignment for individual regions
- Ability to rename regions or tracks
- Install Core modules
- Open Extensions -> ReaPack -> Browse Packages in the menu bar
- Find and install ek_Region Render Matrix Filler
- Execute script ek_Region Render Matrix Filler in the action list
- Enter licence or start trial for 14 days and restart the script. You can buy license key here

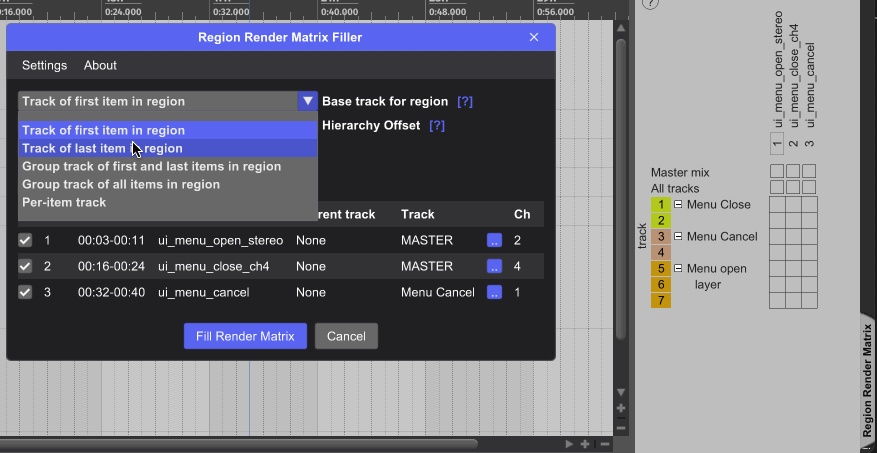
In order for the script to automatically assign a track to a region, it first needs to determine the base track. This is based on the items within the region and can be determined using one of the following methods:
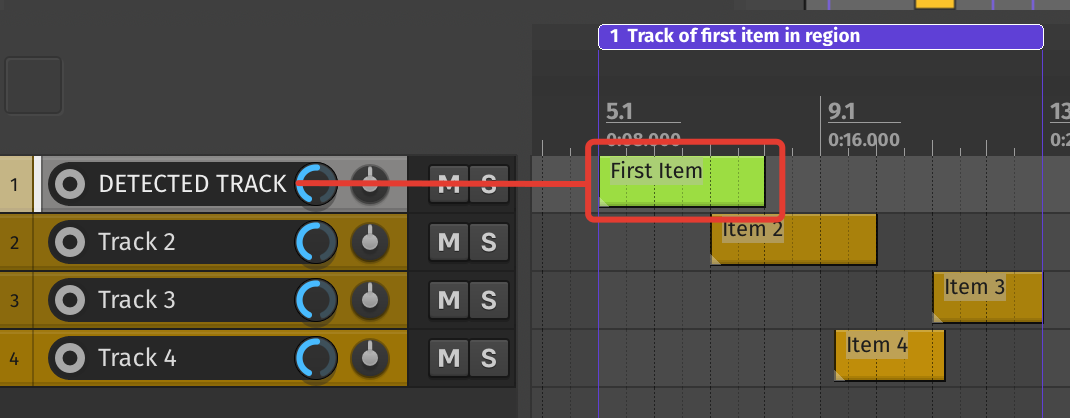
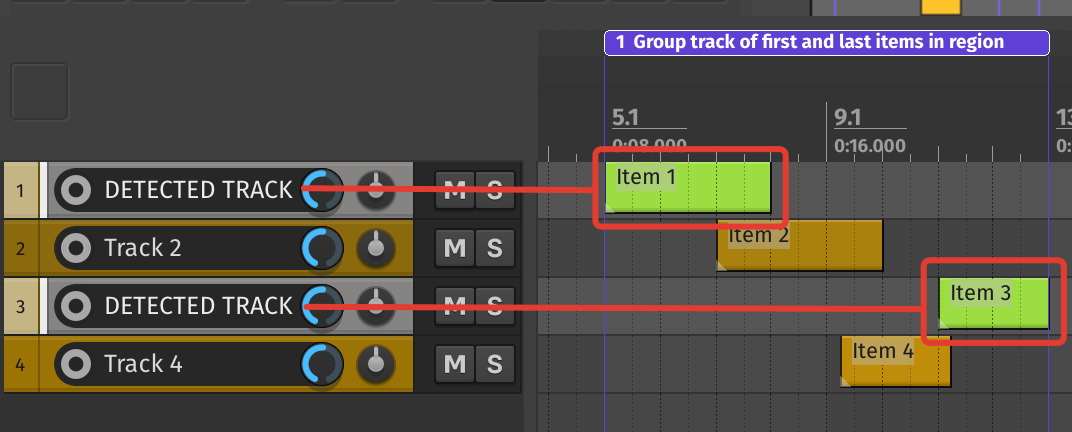
The script will select the track that contains the item starting exactly at the beginning of the region.
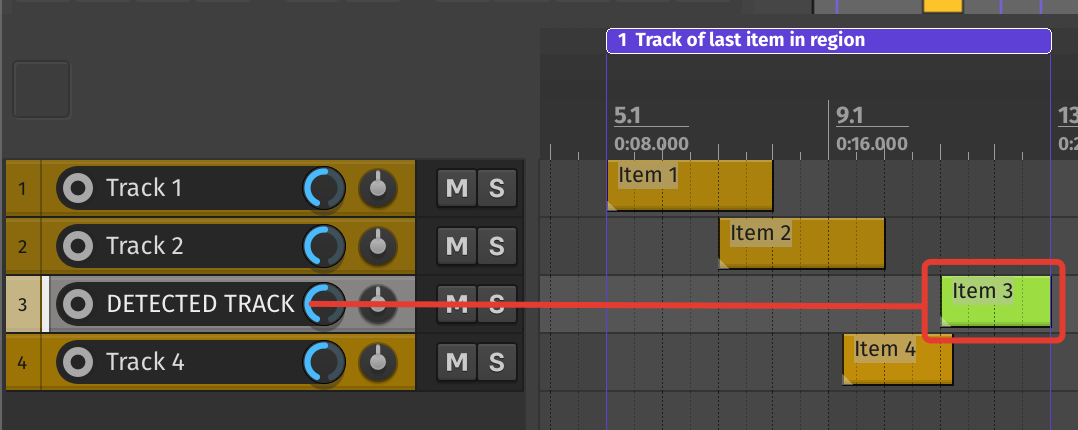
Selects the track that contains the item ending exactly at the end of the region.
Selects the track(s) that contain the items marking the start and end of the region.
Selects the tracks that contain all items located within the region
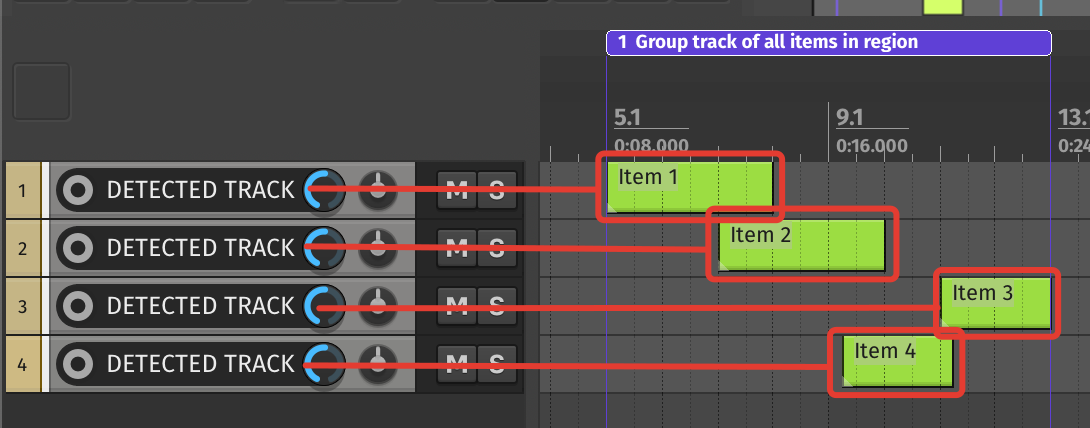
Similar to the previous mode, but each track containing an item within the region will be used individually for rendering. Useful in cases where each track within the region needs to be rendered separately.
⚠️ Note: For all modes except Per-item track, the script looks for a single common track in the track hierarchy. If no suitable track is found, the master track is used as the fallback.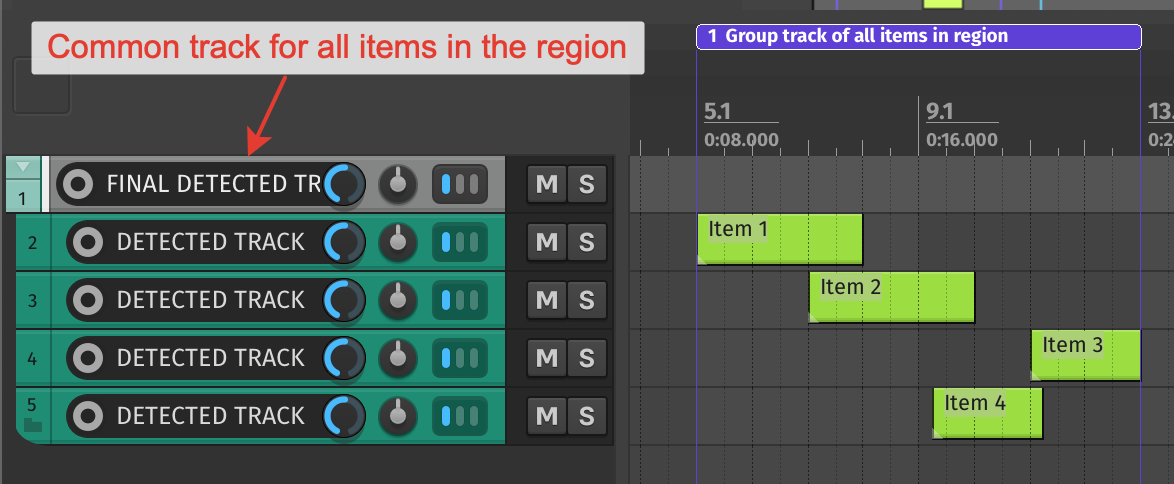
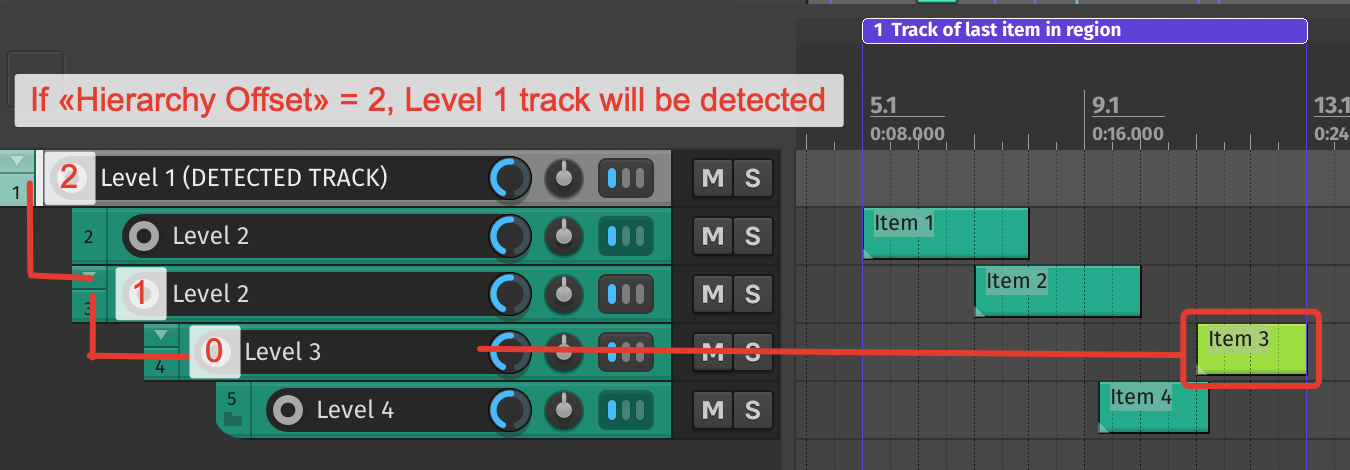
The next important setting is the track hierarchy offset.
Instead of selecting the track that directly contains the items (as defined by the previous setting), you can move up the track hierarchy — for example, selecting the first parent track by setting the offset value to 1.
⚠️ Note: If the offset is set to -1, it always means the master track will be selected.
You can also invert the track hierarchy search. If this option is enabled, the selected track will be the topmost parent of the base track.
When using a hierarchy offset with this option enabled, the selection will move down the hierarchy instead of up.
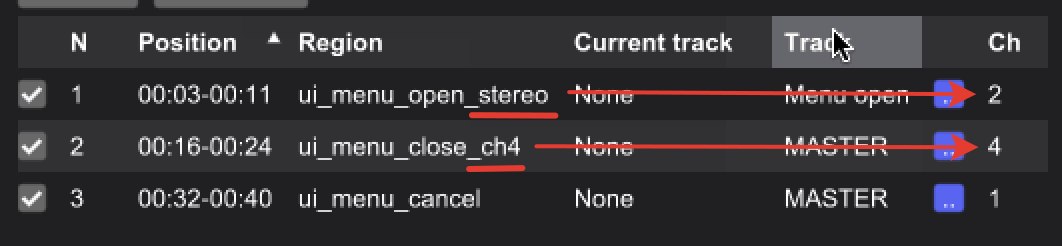
You can also control the number of channels assigned to a region.
To do this, press "Settings" in the menu bar and specify a specific suffix, prefix, or postfix in the region name — which you can customize to your needs.
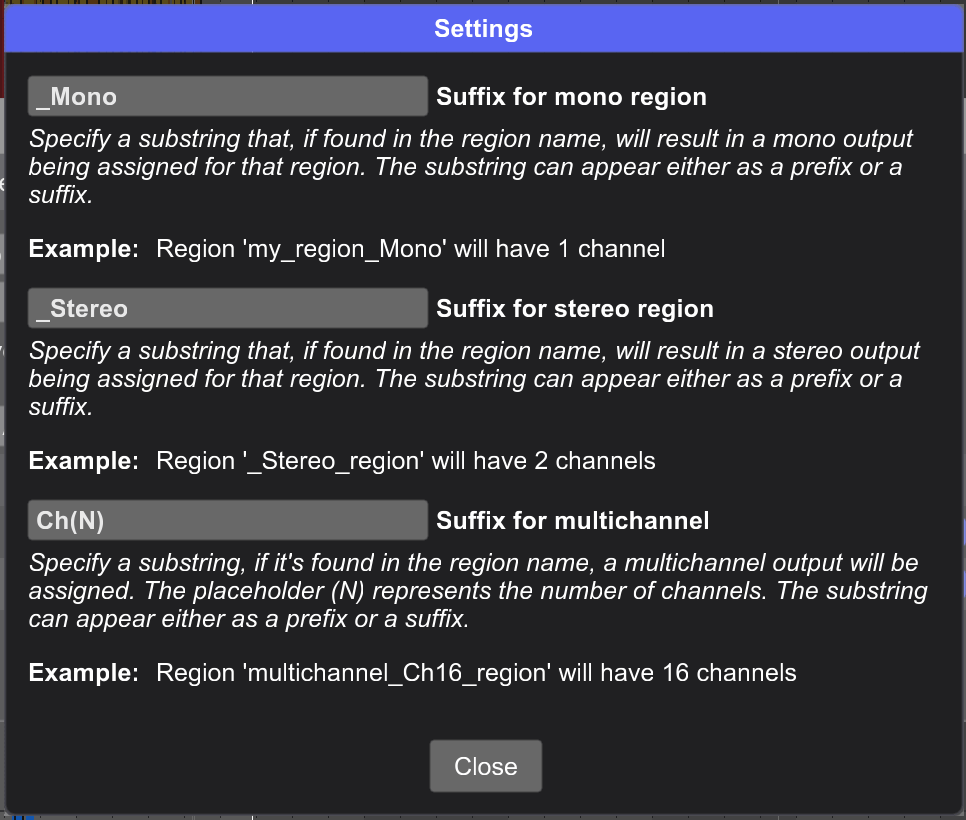
Here is example:
Each track assigned to a region can be manually overridden. To do this, click the small button in the corresponding row of the preview table. The menu that appears will list only the tracks that contain at least one item within the selected region. You can also use this menu to rename the region or the track or to cancel overrided track.
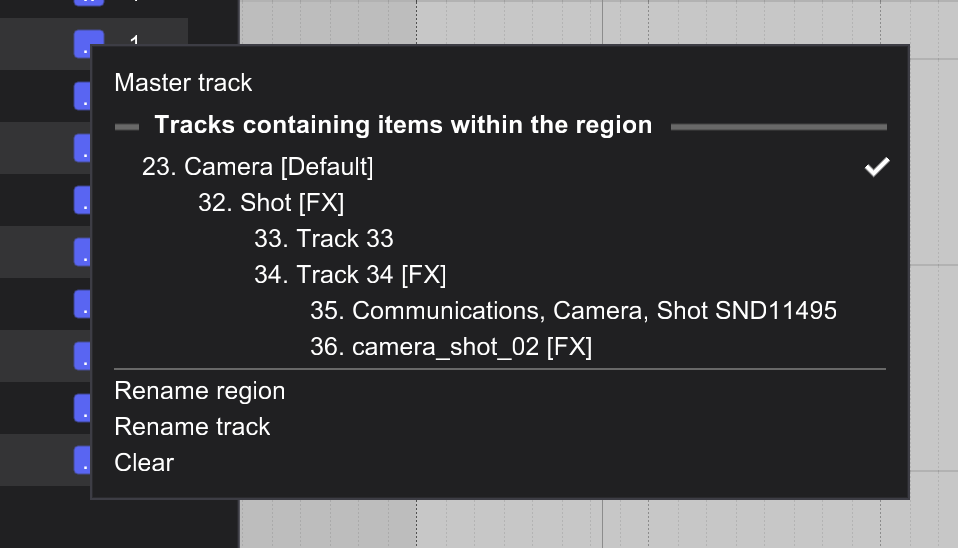
Here is example:
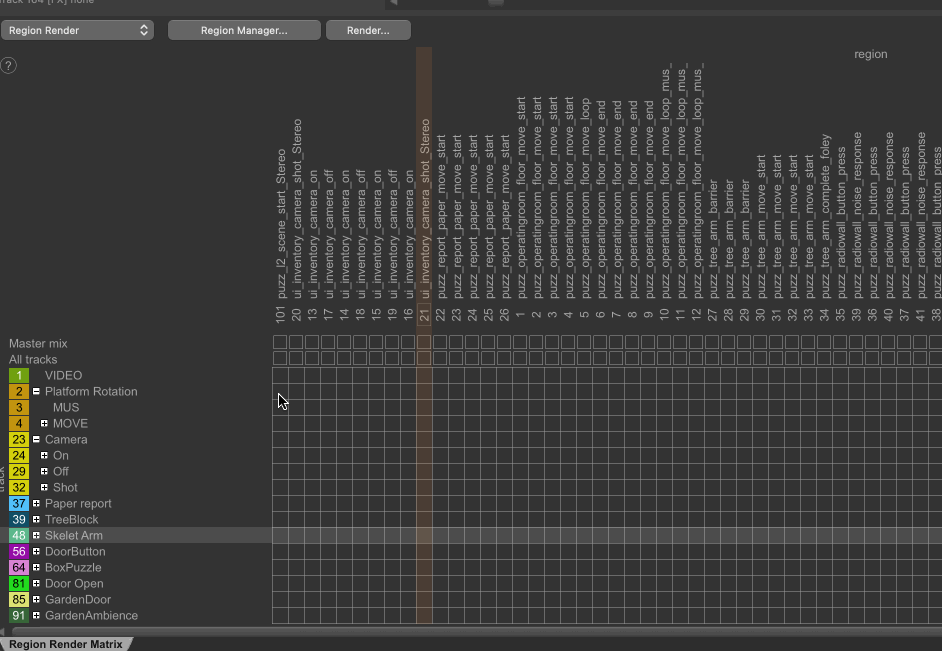
You can also navigate between tracks and regions by clicking on them in the preview table