Tutorial
| Version | Link |
|---|---|
| 5.0 | This Page |
| 4.5 | Tutorial |
| 4.2 | Tutorial |
| 4.1 | Tutorial |
| 4.0 | Tutorial |
| 3.2 | Tutorial |
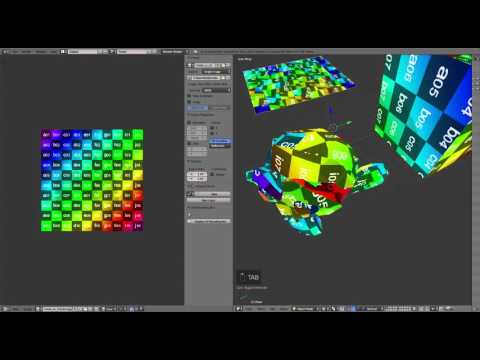
Copy and paste UV coordinates among same/different object's faces.
| Location | 3D View > Tool shelf > Copy/Paste UV |
| Mode | Edit |
[Usage]
- Click check box Copy/Paste UV to show Copy/Paste UV menu
- Select faces whose UV you want to copy
- Click Copy > (Target UV Map)
- Select faces whose UV you want to paste
- Click Paste > (Target UV Map)
- Selection Sequence option provides a way to specify the ordering of copied/pasted faces by face selection
- If Seams option is enabled, you can also copy/paste seams
- Strategy option provides a way to decide copy/paste UV repeatedly if a number of copied faces is differs from pasted faces
Copy and paste UV coordinates among same topology objects.
| Location | 3D View > Tool shelf > Copy/Paste UV |
| Mode | Object |
[Usage]
- Select object whose UV you want to copy
- Click Copy > (Target UV Map)
- Select objects whose UV you want to paste
- Click Paste > (Target UV Map)
- If Seams option is enabled, you can also copy/paste seams
- You can paste UV to the multiple objects
Copy and paste UV coordinates based on the mesh's topology.
| Location | 3D View > Tool shelf > Copy/Paste UV |
| Mode | Edit |
[Usage]
- Click check box Transfer UV to show Transfer UV menu
- Select 2 adjacent faces of the mesh whose UV you want to copy
- Click Copy
- Select 2 adjacent faces of the mesh whose UV you want to paste
- Click Paste
NOTICE: Copied/Pasted mesh must have the same number of faces
- Transfer UV ignore the hidden faces.
- You can paste UV to the multiple meshes
- If Seams option is enabled, you can also copy/paste seams
- If Invert Normals option is enabled, you can copy/paste to the mirrored mesh
Flip or rotate UV.
| Location | 3D View > Tool shelf > UV Manipulation |
| Mode | Edit |
[Usage]
- Click check box Flip/Rotate UV to show Flip/Rotate UV menu
- Select faces whose UV you want to flip or rotate.
- Click Flip/Rotate UV
- Change value Flip UV or Rotate UV in Tool shelf option
- If Seams option is enabled, you can also flip/rotate seams
Make mirrored UV. This feature is derived from below add-on.
Addon: Copy UVs from Mirror
| Location | 3D View > Tool shelf > UV Manipulation |
| Mode | Edit |
[Usage]
- Click check box Mirror UV to show Mirror UV menu
- Select faces you want to refer
- Choose the axis of the mirror direction
- Click Mirror
| Location | 3D View > Tool shelf > UV Manipulation |
| Mode | Edit |
Move UV with a mouse in 3D View. This feature is derived from below add-on.
ADDON: Move the UV from the 3D view
[Usage]
- Click check box Move UV to show Move UV menu
- Select vertices/edges/faces whose UV you want to move
- Click Start
- Press Mouse Left Button to start moving UV
- You can move UV with mouse
- Press Mouse Left Button to stop moving UV
- If you want to cancel moving UV, press Mouse Right Button
Measure and set texel density. This feature is derived from below add-on.
[Addon] World Scale UV
| Location | 3D View > Tool shelf > UV Manipulation |
| Mode | Edit |
[Usage]
- Click check box World Scale UV to show World Scale UV menu
- Select face you want to measure texel density
- Click Measure
- You can see mesh area, UV area and density
- Select face you want to apply texel density.
- Click Apply
- Mode option provides a way to change the calculation method of applying texel density
- Origin option changes the UV origin after applying texel density
Change assigned texture with preserving UV aspect.
| Location | 3D View > Tool shelf > UV Manipulation |
| Mode | Edit |
[Usage]
- Click check box Preserve UV Aspect to show Preserve UV Aspect menu
- Select face you want to change texture
- Select texture you want to assign
- Click Change Image
- Origin option changes the UV origin after changing texture
Preserve UV while you edit the mesh. This feature is same as "Preserve UVs" feature on 3dsmax.
| Location | 3D View > Tool shelf > UV Manipulation |
| Mode | Edit |
[Usage]
- Click check box Texture Lock to show Texture Lock menu
- Select vertices/edges/faces which you want to preserve UV
- Click Lock
- Transform vertices/edges/faces as you like
- Click Unlock, you can return to the UV before locking
- If connect option is enabled, you can keep UV connection by changing other face's UV.
[Usage]
- Click check box Texture Lock to show Texture Lock menu
- Select vertices/edges/faces which you want to preserve UV
- Click Start
- Preserve UV even if you transform vertices/edges/faces
- Click Stop
Texture wrap can set texture coordinate along to the mesh structure.
| Location | 3D View > Tool shelf > UV Manipulation |
| Mode | Edit |
[Usage]
- Click check box Texture Wrap to show Texture Wrap menu
- Select a face whose UV you want to refer as initial position
- Click Refer
- Select an adjacent face whose UV you want to set
- Click Set
- If Set and Refer option is enabled, you don't need to click Refer after clicking Set as long as you refer same face
- If Selection Sequence option is enabled, you can select multiple faces and apply Set. The application order follows the selection sequence
Location: Image Editor in Edit Mode
UV editing with Bounding Box in Image/UV Editor which likes Photoshop/GIMP's Bounding Box transformation.
- Enable Enable feature: UV Bouding Box from add-on preference
- Press Display UV Bounding Box on property window in UV/Image Editor
- Manipulate UV by Bounding Box (Manipulation follows the Photoshop/Gimp Bounding Box rules)
- Press Hide UV Bounding Box to stop manipulation
Location: 3D View in Edit Mode
Project texture to mesh in View3D mode.

- Enable Enable feature: Texture Projection from add-on preference
- Select faces which will be projected
- Press Start on property of Texture Projection in View3D to start
- Select Image which will be projected to faces
- (optional) You can change texture magnitude and transparency
- Press Project to project texture to selected faces
- Press Start to stop
Location: Image Editor in Edit Mode
Integrate same island's shape when Island Packing is done.

- Select faces whose UVs will be packed
- Press UVs > Pack UV in UV/Image Editor to start packing
Location: 3D View in Edit Mode
Keep U or V coordinate when you unwrap UV.
It is similar to Maya's Unfold Constraints.

- Select faces which you want to unwrap
- Press key U
- Click Unwrap Constraint
Location: 3D View in Edit Mode
Realize UVW Mapping.

- Select face you want to adapt UVW mapping
- Press key U
- Click UVW > Box Map or Best Planer Map (Select algorithm which you want to adapt)