Docker images for FileBot.
filebotcommand-line tool (Dockerfile)filebot-nodeweb application (Dockerfile)filebot-watchercommand-line tool (Dockerfile)filebot-xpraremote desktop environment (Dockerfile)filebot-projectorweb renderer (Dockerfile)filebot-webdavwebdav server (Dockerfile)
The filebot command-line tool.
# Run `filebot -script fn:sysinfo`
docker run --rm -it -v "data:/data" -v "$PWD:/volume1" rednoah/filebot -script fn:sysinfo
# Run `filebot --license`
docker run --rm -it -v "data:/data" -v "$PWD:/volume1" rednoah/filebot --license# Run `filebot -rename -r . --format {plex.id}`
docker run --rm -it -v "data:/data" -v "$PWD:/volume1" rednoah/filebot -rename -r /volume1 --format {plex.id}# Run `filebot -script fn:amc ./input --output ./output --action duplicate -non-strict --log-file amc.log --def excludeList=amc.txt`
docker run --rm -it -v "data:/data" -v "$PWD:/volume1" rednoah/filebot -script fn:amc /volume1/input --output /volume1/output --action duplicate -non-strict --log-file amc.log --def excludeList=amc.txt# docker-compose.yml
version: '3.3'
services:
filebot:
container_name: filebot
image: rednoah/filebot
volumes:
- data:/data
- /path/to/files:/volume1
command: -script fn:sysinfo
volumes:
data:
name: filebot-application-dataFileBot Node allows you to call the amc script via a simple web interface.
docker run --rm -it -v "data:/data" -v "$PWD:/volume1" -p 5452:5452 rednoah/filebot:node# docker-compose.yml
version: '3.3'
services:
filebot-node:
container_name: filebot-node
image: rednoah/filebot:node
hostname: filebot-node
restart: unless-stopped
volumes:
- data:/data
- /path/to/files:/volume1
ports:
- 5452:5452
volumes:
data:
name: filebot-application-dataOnce the FileBot Node Service is running, you can access the web interface via http://localhost:5452/filebot/. You can create prepared tasks via Execute ➔ Schedule and then execute them remotely via curl http://localhost:5452/task?id=${TASK_ID}.
You may secure the FileBot Node Service by using HTTPS and BASIC authentication:
docker run --rm -it -v "data:/data" -v "$PWD:/volume1" -e FILEBOT_NODE_AUTH=BASIC -e FILEBOT_NODE_AUTH_USER=YOUR_USERNAME -e FILEBOT_NODE_AUTH_PASS=YOUR_PASSWORD -p 5452:5452 -v /etc/ssl:/etc/ssl:ro -e FILEBOT_NODE_HTTPS=YES -e FILEBOT_NODE_HTTPS_PORT=5453 -e FILEBOT_NODE_HTTPS_KEY=/etc/ssl/private/server.key -e FILEBOT_NODE_HTTPS_CRT=/etc/ssl/certs/server.crt -p 5453:5453 rednoah/filebot:node# docker-compose.yml
version: '3.3'
services:
filebot-node:
container_name: filebot-node
image: rednoah/filebot:node
hostname: filebot-node
restart: unless-stopped
volumes:
- data:/data
- /path/to/files:/volume1
- /etc/ssl:/etc/ssl:ro
ports:
- 5452:5452
- 5453:5453
environment:
- FILEBOT_NODE_AUTH=BASIC
- FILEBOT_NODE_AUTH_USER=YOUR_USERNAME
- FILEBOT_NODE_AUTH_PASS=YOUR_PASSWORD
- FILEBOT_NODE_HTTPS=YES
- FILEBOT_NODE_HTTPS_PORT=5453
- FILEBOT_NODE_HTTPS_KEY=/etc/ssl/private/server.key
- FILEBOT_NODE_HTTPS_CRT=/etc/ssl/certs/server.crt
volumes:
data:
name: filebot-application-data
The filebot-watcher command-line tool watches a given folder and executes the amc script on newly added files. Please read the manual for details and watch the video tutorial to see it in action.
docker run --rm -it -v "data:/data" -v "$PWD:/volume1" rednoah/filebot:watcher /volume1/input --output /volume1/outputThe first argument $1 is the watch folder. The remaining arguments are amc script options.
# docker-compose.yml
version: '3.3'
services:
  filebot:
    container_name: filebot-watcher
    image: rednoah/filebot:watcher
    restart: unless-stopped
    volumes:
      - data:/data
      - /path/to/files:/volume1
    command: /volume1/input --output /volume1/output # see amc script usage
volumes:
  data:
name: filebot-application-dataRun the FileBot Desktop application via xpra and make it remotely available at http://localhost:5454/.
docker run --rm -it -v "data:/data" -v "$PWD:/volume1" -e XPRA_AUTH="password:value=YOUR_PASSWORD" -p 5454:5454 rednoah/filebot:xpra# docker-compose.yml
version: '3.3'
services:
filebot:
container_name: filebot-xpra
image: rednoah/filebot:xpra
hostname: filebot-xpra
restart: "no"
volumes:
- data:/data
- /path/to/files:/volume1
ports:
- 5454:5454
environment:
- XPRA_AUTH=password:value=YOUR_PASSWORD
volumes:
data:
name: filebot-application-dataPlease read How do I run the FileBot Desktop application on my Synology NAS or QNAP NAS? for detailed setup instructions for Synology NAS and QNAP NAS devices.


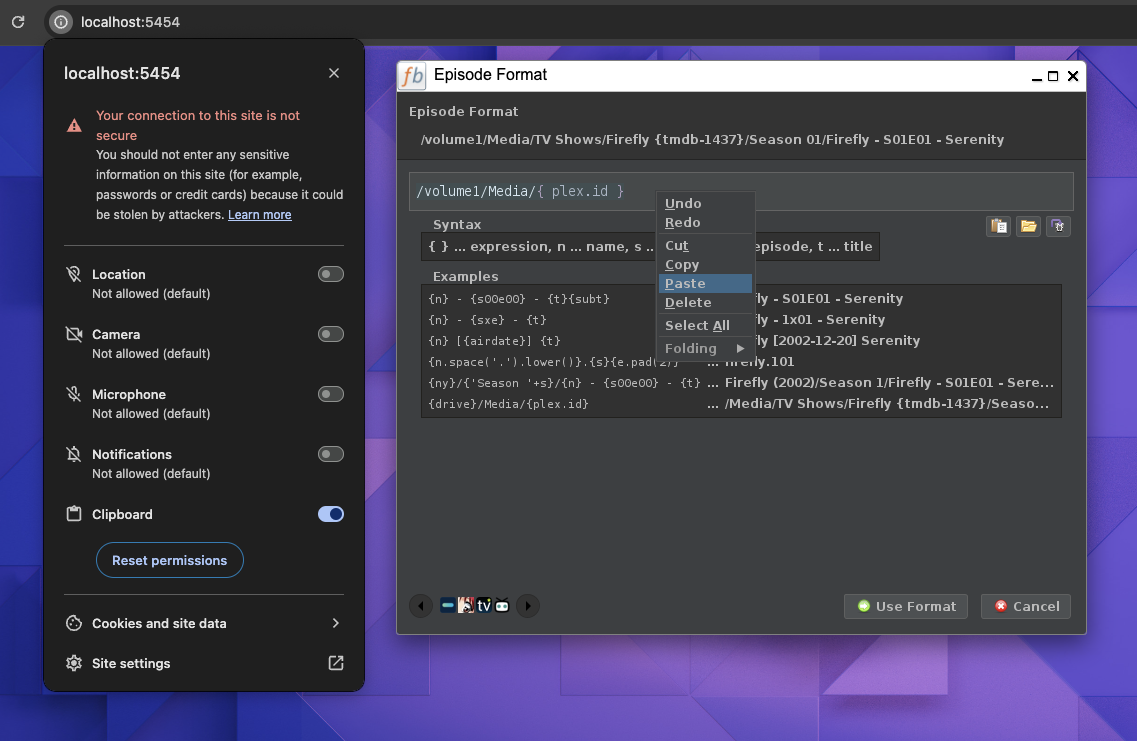
If the clipboard does not work, then you may need to enable Clipboard permissions. If CTRL+V does not work, then you may need to use Right-Click ➔ Paste to paste text from the system clipboard:
If you have a Reverse Proxy that takes care of SSL and authentication, then you can disable authentication via -e XPRA_AUTH=none and disable remote access via -e XPRA_BIND=127.0.0.1.
Run the FileBot Desktop application via JetBrains Projector and make it remotely available at http://localhost:8887/.
docker run --rm -it -v "data:/data" -v "$PWD:/volume1" -p 8887:8887 rednoah/filebot:projector# docker-compose.yml
version: '3.3'
services:
filebot:
container_name: filebot-projector
image: rednoah/filebot:projector
hostname: filebot-projector
restart: unless-stopped
volumes:
- data:/data
- /path/to/files:/volume1
ports:
- 8887:8887
volumes:
data:
name: filebot-application-dataRun an Apache WebDAV Server for remote file system access via http://localhost:8080/.
docker run --rm -it -v "$PWD:/volume1" -e USERNAME=alice -e PASSWORD=secret1234 -p 8080:8080 rednoah/filebot:webdav# docker-compose.yml
version: '3.3'
services:
filebot:
container_name: filebot-webdav
image: rednoah/filebot:webdav
restart: unless-stopped
volumes:
- /path/to/files:/volume1
ports:
- 8080:8080
environment:
- USERNAME=alice
- PASSWORD=secret1234
volumes:
data:
name: filebot-application-data
If you are using the filebot-xpra container, please install your license key via the Select License File button in the GUI as usual:

If you are using the filebot-node container, please install your license key via the Tools ➔ License button in the WebUI as usual:

Alternatively, you can activate your license by calling filebot --license from within the docker container:
# Read License Key from Console Input
docker run --rm -it -v "data:/data" rednoah/filebot --license
# Read License Key from License File
docker run --rm -it -v "data:/data" -v "$PWD:/volume1" rednoah/filebot --license /volume1/T1000.psmYour license will then be stored in -v data:/data (i.e. named persistent volume data mapped as /data in the container file system) which is the persistent application data folder. All your FileBot docker containers must therefore use the same data:/data volume mount so that they can share the same application data folder. Please read Run your app in production ➔ Manage application data ➔ Volumes for details.
If you use -e PUID or -e PGID to run filebot with a different UID then you must use the same -e PUID or -e PGID environment variables when calling filebot --license to install the your license key into the correct user-specific application data folder. DO NOT open a shell to a running container to call filebot --license because your shell will be running as root(0) and not as filebot(PUID) user.
Alternatively, you can map your license file into the container at the expected file path directly via your launch configuration:
docker run --rm -it -v "data:/data" -v "/path/to/FileBot_License_P12345678.psm:/data/filebot/license.txt" -v "/path/to/files:/volume1" rednoah/filebot -script fn:sysinfo# docker-compose.yml
version: '3.3'
services:
filebot:
container_name: filebot
image: rednoah/filebot
volumes:
- data:/data
- /path/to/FileBot_License_P12345678.psm:/data/filebot/license.txt
- /path/to/files:/volume1
command: -script fn:sysinfo
volumes:
data:
name: filebot-application-dataYou can enter your OpenSubtitles login details by calling filebot -script fn:configure from within the docker container.
# Read login details from Console Input
docker run --rm -it -v "data:/data" rednoah/filebot -script fn:configure
# Pass login details via Command-line Arguments
docker run --rm -it -v "data:/data" rednoah/filebot -script fn:configure --def osdbUser=USERNAME --def osdbPwd=PASSWORDYour user settings will then be stored in -v data:/data (i.e. named persistent volume data mapped as /data in the container file system) which is the persistent application data folder. All your FileBot docker containers must therefore use the same data:/data volume mount so that they can share the same application data folder.
You can set the environment variables PUID and PGID to run the process with the given UID:
-e PUID=1000 -e PGID=1000environment:
- PUID=1000
- PGID=1000You may use PUID=0 to run as default root user or docker --user:
docker run --rm -it -v "data:/data" -e PUID=0 -e PGID=0 rednoah/filebot -script fn:sysinfoYou can use the --entrypoint option to run bash on startup:
$ docker run --rm -it -v "data:/data" -v "$PWD:/volume1" -e PUID=1000 -e PGID=1000 --entrypoint /opt/bin/run-as-user rednoah/filebot bash
filebot@dcc9dbeac18d:/$ filebot -version
FileBot 4.9.6 (r9125)
docker treats each volume mount as a separate filesystem. Thus, if you are using --action MOVE or --action HARDLINK then the input path and the output path must be on the same volume mount. If you process files across volume mounts, then --action HARDLINK will fail with I/O error: cross-device link, and --action MOVE and --action DUPLICATE will resort to physically copying files.
Please organize your files like so, and then use /path/to/files as single volume mount:
/path/to/files/input
/path/to/files/output
-v /path/to/files:/volume1volumes:
- /path/to/files:/volume1